This article is a step by step guide for taking a screenshot with the built in utility “Snipping Tool”
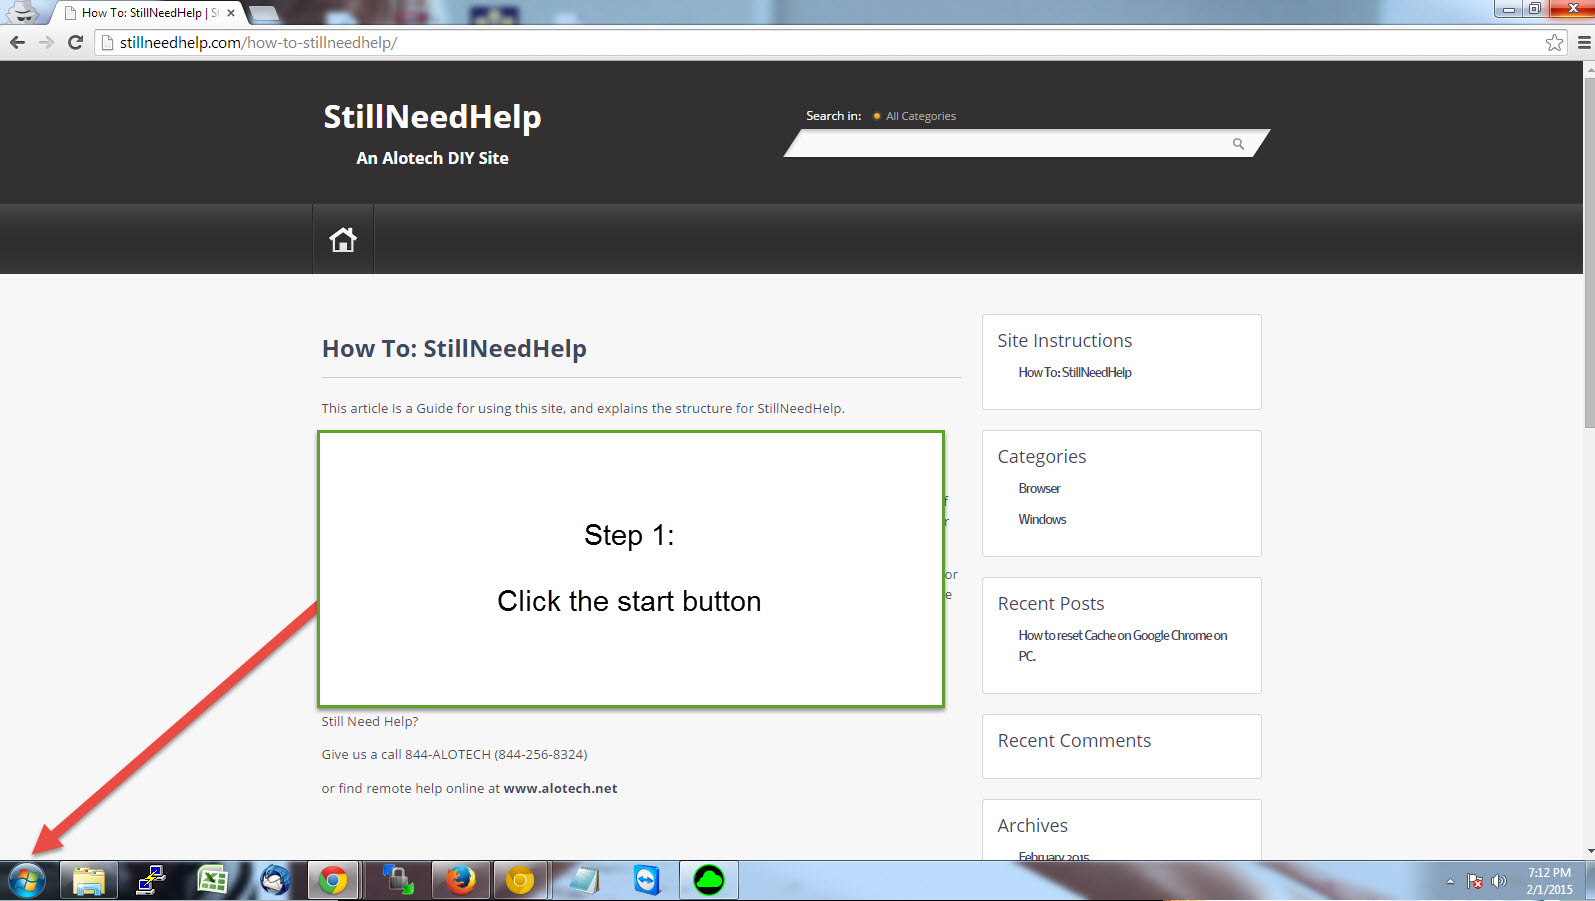
Step 1: open the start menu
Step 2: Type “snipping Tool” into the search bar in the start menu. Select the “Snipping Tool” program.

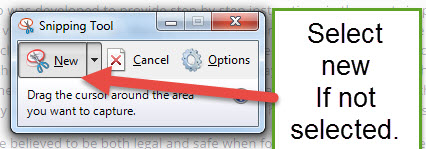
Step 3: Select new If not Already selected.
Step 4: Drag a box around what you would like to have in your screenshot picture.

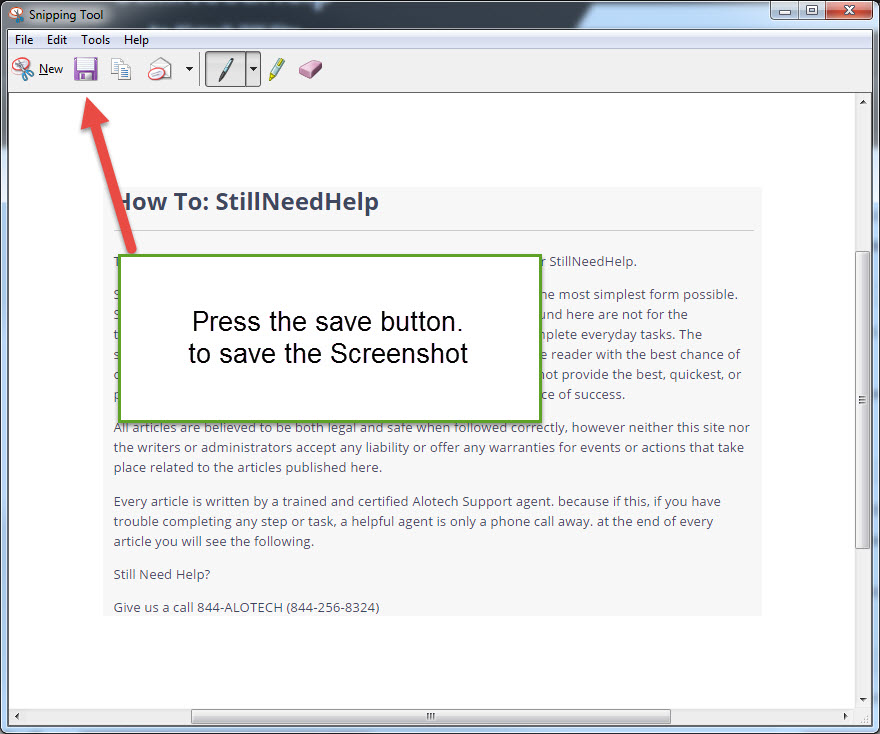
Step 5: Press the save button. to save the Screenshot
Task Complete!
Advanced Notes
You can also find the Snipping Tool in the start menu -> all programs -> Accessories